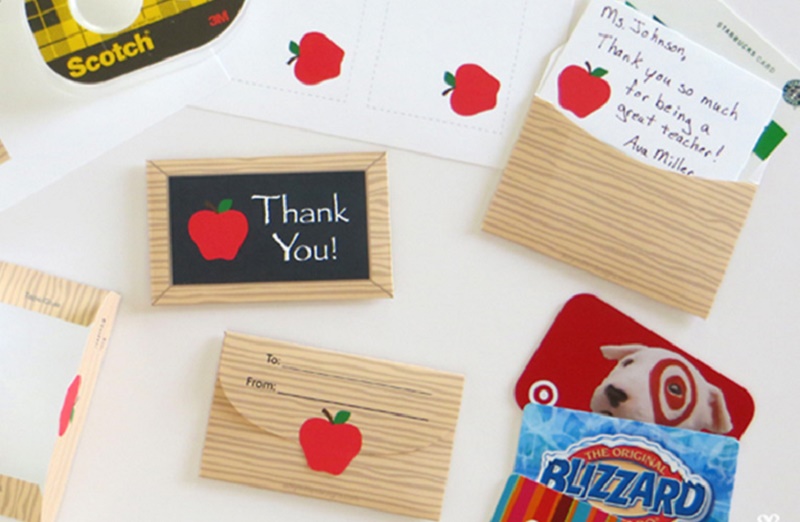
Discover our 7 DIY teacher gift card ideas, ideal to thank for their dedication, patience and teachings in this end of the course. Particularly I think it is nice to have a detail with them because it is a way to thank them for their work, dedication and patience they have had with our children throughout the course. Many of them spend more time with our little ones than we do ourselves.
The best gift is, without a doubt, to recognize his work. And what better way to do it than with a nice handmade gift? Sure many of you now find yourself with the small dilemma of what to give our teachers and teachers. If you are at that point, we will help you with fun gift ideas for very simple, beautiful and ideal teachers so that the children of the house can participate in its creation. Keep reading: 7 school tips for choosing the best business school
7 Teacher Gift Card Ideas

Do you want to know how to make these 7 original gifts for teachers? Pay attention that we started.
Gift for teacher or teacher 1: Medal to the best teacher in the world
This medal is very easy to make, a simple and colorful children’s craft . You can add a ribbon to hang around the neck or stick a brooch from behind to light the clothes.
What materials are we going to need?
– Scrapbooking paper. I have chosen scraps from the “Mosaic” collection of Anita and her scrapbooking world.
– Fixo Glue liquid silicone.
– The double-sided tape of Anita and her world.
– ABC of the basics of Anita and her world.
– Felt flowers from the basics of Anita and her world.
– Pencil, ruler, cutter, plegadera.
Tell you that the base of the medal is a scrap paper rosette to which we will add some details and decorations.
Step 1. Cut the paper
Cut two strips of stamped paper that you have chosen of 30 x 5 cm, point to each centimeter and fold like a fan. Help yourself with the plegadera. Join the 2 strips at the ends. You can help with this tutorial if you do not know how to do it: How to make a paper rosette easily .
Step 2: Assembly
For the rosette to take shape we must stick it on a base but before we will use to paste a few ornaments. Cut a circle of paper about 5 cm in diameter and several strips 1.5 cm wide with two peaks at one end. Glue them with liquid silicone over the circle so that they protrude below the circle. If you are going to use a tie to hang around the neck now is the time to stick it on top of the circle. If you are going to use a brooch, stick it when you finish the assembly. Now stick the rosette.
Step 3: Decoration
To decorate cut a circle of paper about 7 cm in diameter and paste on the rosette. With the adhesive alphabet, he writes a phrase, such as: “To the best teacher in the world” . Finish decorating your taste with enamels, flowers, plates, etc.
Gift for teacher or teacher 2: Shaker card with the pencil shape

A gift card to a very funny teacher or teacher, you will see that you will surely love it if you choose this idea!
What materials will you need?
Scraps of scrapbooking paper from Anita and her world.
– Acetate sheet
– 3D double-sided tape of Anita and her world.
– Double-sided tape Anita and her world.
– Sequins of the basics of Anita and her world.
– Cotton yarn from the basics of Anita and her world.
– Pencil, ruler, cuter, plegadera, scissors, glue.
– Card pencil template, which you can download by clicking here .
Step 1: Preparation of the material.
Download the template and cut the pieces in the indicated colors following the references: the continuous lines are of cut and dotted lines to bend. I used papers from the “Baby Pink” collection of Anita and her world that has some lovely pastel colors.
Step 2: Assembly
On the basis of the card sticks the whole pieces of pink and yellow. Place double-sided 3D tape on the contours of the pencil. Place the sequins inside each compartment and glue the acetate on top. Glue the rest of the pieces with double-sided tape.
Step 3. Decoration
Add decoration according to your presence, you can surround the pencil with a piece of cotton thread, place a poster, decorate with plates, etc.
Gift for teacher or teacher 3: Painting “apple of virtues”

Another element that we associate with teachers are red and glossy apples. This cute decorative box, in addition to having an apple shape, recalls the virtues of a good teacher.
What materials do you need?
– Piece of white cardboard.
– An scrapbooking scrapbook from Anita and her world in green and brown.
– ABC foam and red stickers from the basics of Anita and her world.
– Enamels, buttons, flowers from the basics of Anita and her world.
– Pencil, ruler, cutter.
– Picture frame.
Step 1. Prepare the materials
Cut a piece of white cardboard the size of the frame and draw the outline of an apple in the center.
Step 2: Fill
In the interior of the block he writes different qualities of a teacher: patient, cheerful, understanding, alternating the different ABCs. Fill the spaces with buttons, enamels, felt flowers, etc.
Step 3. Mount the frame
Finally put the sheet in the frame and add a sheet of green paper and ornaments of your choice.
Gift for teachers 4: Jar of sweets with paper flowers

What materials will you need?
– 1 glass jar
– Scrapbooking scraps of the “With love” collection.
– Alphabet of foam and stickers in blue color of the basics of Anita and her world.
– Double-sided tape
– Pencil, ruler, cutter.
– Thread.
– Enamel dots.
– Sticks or straws.
– Chuches.
This craft to give to teachers is very colorful and easy to make. You will see!🙂
– The first thing is to cut a piece of paper , in my case I have chosen a scrapbook paper from the “With love” collection of Anita and her world, about 5 cm. The size will depend on the type of boat and the length needed to cover the contour of the jar.
– Next, we paste with double-sided tape the piece of scrap paper that we have cut.
Tip: To disguise the place where both ends of the paper meet, we can use a cutout from the same collection to hide the area 😉.
– Now we go to decorate the neck part of the jar with a bit of finite rope , from which we will hang a label. We can use some of the labels that come in the collection of papers “with love” . In this paper label we will add the message of thanks to our teacher or professor. To write the message, my son used the alphabet of Anita stickers and his world and the rubber eva.
Then we go to decorate the top of the glass boat.
The lid of the boat as it was white leaves it as it is and we went directly to make the paper flowers .
How to decorate our gift with paper flowers
Step 1: Cut with a circle cutter 6 circles of the same color and a different one.
Step 2: Cut 6 pieces of acetate of these measures: 1 x 3.5 cm and we put double sided tape on one side.
Step 3: We paste an acetate in each of the 6 paper circles of the same color and then join them to the center, as in the photo.
Step 4: We stick a straw, green if possible, on the back to serve as the stem of the flower.
Step 5: Now we just need to draw a couple of sheets of paper, cut and paste them so that our flower is ideal.
* By the way, if you want to know other formats of paper flowers I recommend you visit this tutorial:
How to make a paper flower center step by step.
Now, we just have to join the paper flowers to the lid of the jar . To do this, follow these steps:
– With a punch, drill 3 holes in the size of a barbecue stick.
– We put the sticks placing them at different heights.
– Cut the sticks inside the cap and fix them with hot silicone (this step is best not done by children). So that it is not ugly, we cut a circle the size of the stopper and cover it.
– Insert the straws into the two holes at the ends (as you can see in the photo) and adjust the length.
We can add a paper grinder as a final detail and stick it on the center stick. Finally, we have to introduce the sweets in the pot and that’s it! We would have our first detail to give to a teacher. Now let’s go for the second one.
Read also: What is special education?
Gift for teachers 5: Blackboard

What teacher can resist a mini blackboard with a loving message from your student?
Making this gift idea for a teacher is also super easy. Following the 4 steps that I explain below you will get a thank you card of the most original.
– We would need a colored cardboard or stamped scrap paper to make the base of our card. The measurements would be: 20 x 15 cm. Once we have the scrap paper with these measures we would fold it in half .
– It would also need a piece of cork of 11 x 9 cm (or imitation wood) to make the bottom of our blackboard. We stick it to cardboard or scrap paper with double-sided 3D tape.
– Next, we need a black cardboard of 9.5 x 6.5 cm that makes a slate and we paste it on the centered cork.
– Finally, we would decorate the card with elements of the “games” collection of Anita and her world and some of its basics.
As you can see, in the photo I used the eva rubber letters and the enamels dots of the scrapbooking basics of Anita and her world and 3 stickers from the “games” collection.
Ideally, children decorate their gift for the teacher to their liking. The plates, labels, cut-outs and stickers from the “games” collection are ideal for this and all its elements combine with each other. They will have a funny and colorful card.
Oh! And do not forget to write a nice message on the board!
Gift for teacher or teacher 6: Magnet card with the pencil shape

Let’s go with another detail for pencil-shaped teachers. Although this time it is a fridge magnet customized by his student. This step by step has no complication step. you just have to follow this scheme and decorate.
We apply on scrap paper (we can use some of the back of the papers of Anita and her world) or cardboard the scheme here above. When it comes to customizing and decorating the pencil lead, we can paint it with a black marker or use a washi tape that has that color.
In pencil, the child can draw a happy face, paste moving eyes and add blush sticking 2 enamels dots of Anita and her world.
We attach to the pencil, with cotton thread of Anita and her world, a card from the “games” collection of Anita with a message for her teacher.
Finally, stick a magnet on the back so you can put it in the fridge.
Gift for teacher or teacher 7: Explosive card
As a last gift for original teachers I propose an explosive box made with scrapbook papers from the collection “games” of Anita and her world, a collection with colorful designs and very consistent with the universe of children and school.
Then I explain how to make this gift idea for teacher or proefsor step by step.
Step 1: Cut a piece of yellow cardboard with these measures: 23 x 12.5 cm .
On this card we mark in 5,4 cm, 10,8 cm, 16,2 cm and 21,6 cm and narrow side in 6,5 cm and we cut on the striped lines.
Step 2: Cut 4 pieces of 6 x 5 cm of a stamped paper that the child of the “games” collection of Anita likes . And another 4 pieces of 5.5 x 5 cm also of paper from the collection “games” for the interior.
Step 3: Cut two pieces of 8 x 3 cm yellow cardboard . We marked by the ends 1.3 cm and we folded as in the photo.
details-to-give-teachers-to-hand
Step 4: We paste the papers as in the photo and round the corners of the upper part. We do the same, but on the opposite side, so that when we turn we see it.
Step 5: Now we form the box by gluing the plate with glue.
Step 6: Next, we paste the pieces of 8 x 3 cm that we have made in step 3 (as you can see in the photo).
Step 7: Now we are going to use the sheet of cut-outs from the “games” collection and cut different elements that will serve to decorate the inside of the box / card.
We will use small pieces of acetate to join the cutouts to the box. Finally, we will stick them inside the box. Viewing the photo will be clearer.
Step 8: The last step will be to decorate the child’s taste and write the thank-you messages to the teacher.
And with this last proposal, we have already taught you our 7 gift ideas for teachers for this end of the year.
Which one of these 7 details to give to teachers have you liked the most? Will you encourage yourself to do one? Hope so! You may be interested also: http://guangzhouflowershop.com/2018/04/30/types-of-flower-packaging/